|
Supplies needed to make your own DIY String Art:
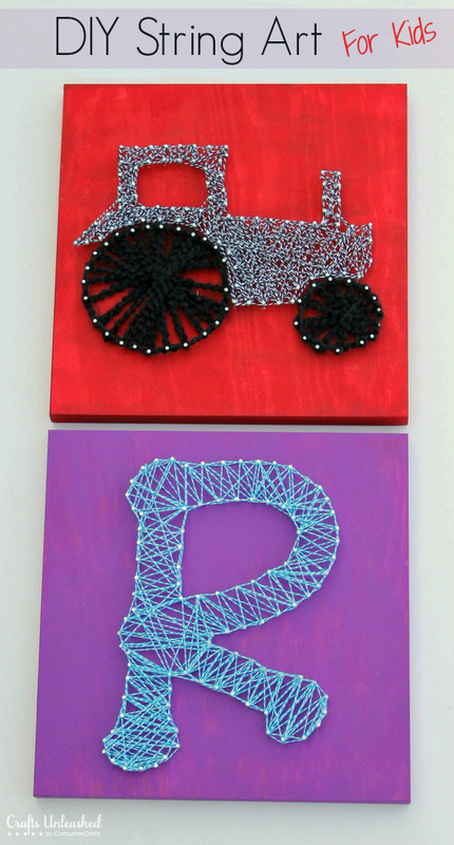
Step 1. Design your image on your dot paper. Step 2. Choose colored paper to glue on the board in the color or your choice. Step 3. Use a pencil to mark approximately every 1/2 inch all the way around your image. Step 4. Add toothpicks around the edge of your image and through the paper to hold into place. Do NOT put the toothpicks all the way into the board. The toothpick should stick up so you can wrap the string around them. Use a pencil to mark approximately every 1/2 inch all the way around your image. Step 5. Make sure all of the toothpicks are poking out of the board at the same height. Step 6. Now, rip off your paper and you are left with a sea of toothpicks on a colored board. You are ready for string! Step 7. Young and old alike will love adding string around the nails. In and out, around, zig zag, any combination they can come up with! Start on any toothpick and knot your string. Then work it around until you are happy and knot it off on your last toothpick as well. Make sure to keep the string taught in order to get the proper results. You can now see what I meant about the toothpicks. They don’t have to be straight and perfect…no one will ever know! Grab your string, board, and toothpicks and get started today. You will love seeing your art take shape as you wrap string around those toothpicks. What image will you use? |
stevensonj.net
| Stevenson Stars |
|
- Home
-
Math Resources
-
Science
- Science Links
- Science Interactive Practice
- 5th Grade NGSS Lessons
- Science Test Achievement Descriptors
- Scientific Method >
- Scientific Tools
- Science Fair Project Ideas
- Mass & Density
- Compounds Solutions and Mixtures
- Classification of Living Things >
- Plants >
- Earth Moon and Sun >
- Electricity >
- Forces >
- Simple Machines >
- Water Cycle >
- Rock Cycle and Erosion >
- Natural Resouces >
-
STEAM Projects
- Tutoring Sites
- Literacy Web Sites for Children
- Social Studies
- Communication Arts Reading
- Keyboarding and Typing Sites
- Typing Interactive Learning Links
- Assignment Submission
- Classroom Expectations Videos
- Expanded Notation
- Properties Of Operations
- Exponents
- 5th Grade Practice Test
- New Page
- Module #1
- Apples for Teachers
